Harvesting, drying, and curing your homegrown cannabis is really the make or break phase of the growing process. I’ve watched helplessly countless times as new growers jump the gun and chop down plants prematurely only to wind up with subpar end results. Rushing the drying process and botching the cure are the next biggest offenses in the newbie-sphere. But the process doesn’t need to be complicated OR intimidating. There are a bunch of key points to keep in mind while you navigate this phase but I will also add that knowing when to harvest and how long to dry are as much an art as a science. Once you’re comfortable making the tough calls, you will just KNOW and FEEL when the plants are ready.
Determining Ripeness
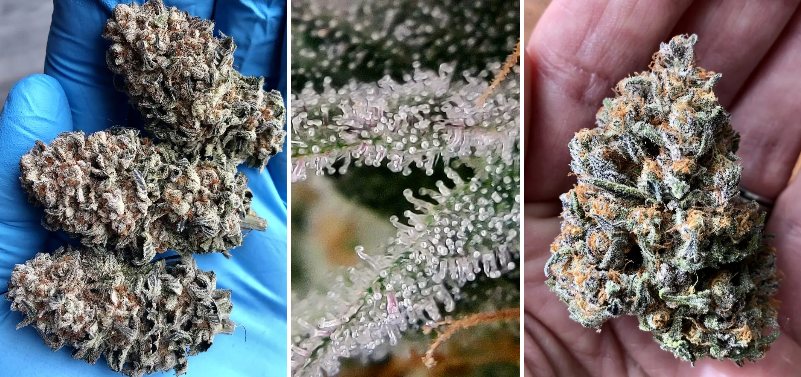
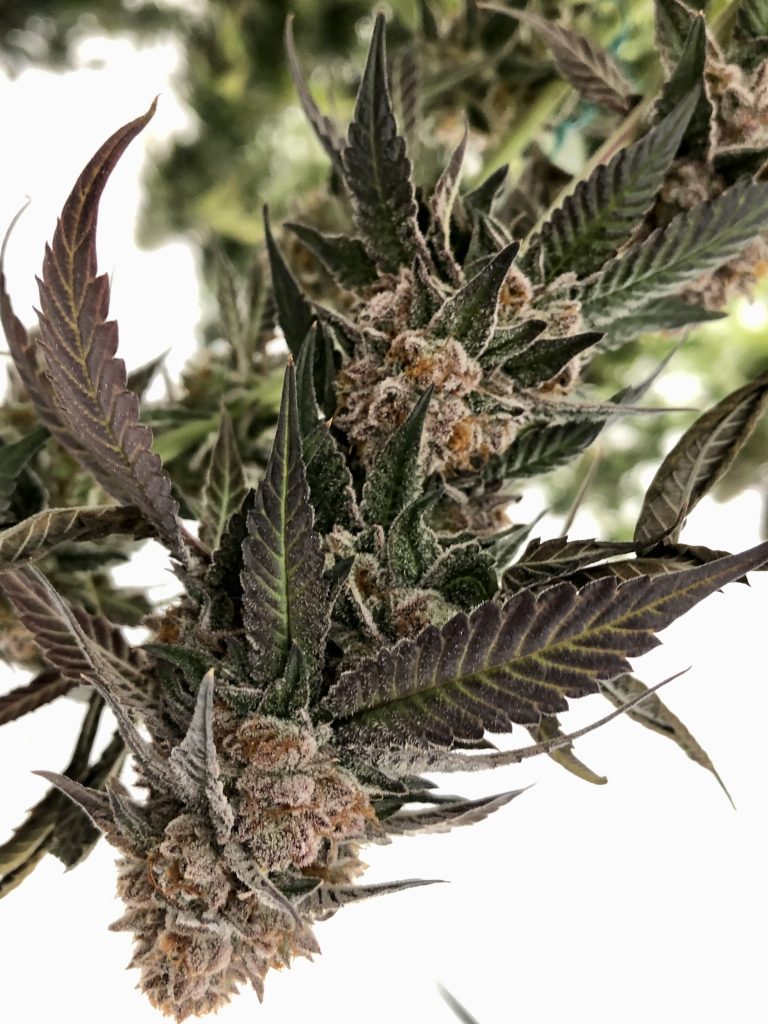
The most important factor when deciding if it’s time to cut down a plant is measuring the ripeness of the trichomes. You’re probably familiar with trichomes if you’ve gotten this far, but just to summarize it, trichomes are the bulbous, stalked, mushroom-looking appendages that grow all over the flowers and leaves of the plant and make cannabis the powerhouse of medicine that it is. These clear, glandular growths are where a majority of the cannabinoids, terpenes, and flavonoids are produced and are really what we are growing these plants for.
I’ll usually begin checking the trichomes on my plants during week 7 of flowering when I start noticing flower development beginning to reach a peak. Typically, on most 7-9 week flowering strains, the flowers will reach their final size and look ready to come down about a week before they’re actually at peak ripeness. It’s for this reason that many new growers cut their plants down earlier than is ideal in regards to cannabinoid content. By holding back the urge to harvest your plants prematurely, and exhibiting patience, you have a better chance of your end product reaching its full potential.
Using a jeweler’s loupe or small, handheld microscope, you can get up close and personal with the trichomes on your plants and definitively, with confidence, determine if it’s time to harvest your plants or let them continue ripening. With your magnification tool in hand, focus in on one of your flowers and take notice of what the trichomes look like. When trichomes are immature, the heads on the stalks will be translucent and clear. As they continue to mature and ripen they will take on a cloudy, opaque look. And as they reach full ripeness, the trichomes will develop an amber color.


Generally speaking, you want to harvest your plants when a majority of the trichomes appear cloudy and you’re starting to see some of them turn amber. I usually aim for a mix of 80% cloudy and 20% amber. If you wait until a higher percentage of trichomes turn amber your end product will have a more sedative effect and can result in “couch lock”. On the flip side, if you harvest your plants when there are still a lot of clear trichomes mixed in with the cloudy ones then your end product will have a more “uppy” head high with less body effect. There’s really no “right” way to prefer your cannabis and I would suggest experimenting with harvesting plants in stages if you’re unsure of your preferences. Personally, I would rather harvest my plants a littler later as I find that fully cloudy trichomes mixed with 20% amber gives me a chilled out effect that I prefer over the racier head high of earlier harvested buds. Premature flowers give me anxiety and make my heart race so I tend to avoid harvesting when there are still a lot of clear trichomes.
One of the best tips to remember is: when in doubt, let the plants keep going. And when you think they’re ready, wait another week. It’s better to err on the side of going a little longer than it is to harvest your plants early. PATIENCE!!
Harvesting
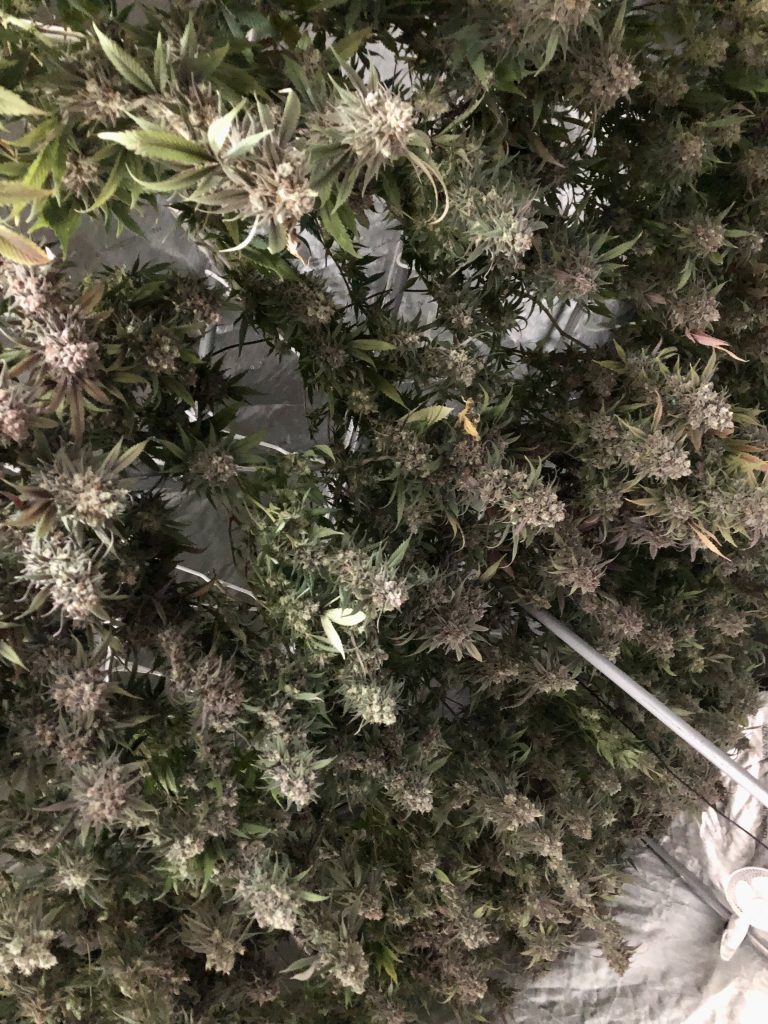
Once you’ve determined that your plants are ripe enough to harvest it’s time to plan out a strategy and start cutting them down. You can either opt to cut the plant at the bottom of it’s base and hang the entire plant to dry or you can cut individual branches and hang those. I recommend hanging the whole plant and only removing the largest fan leaves. If you do it this way the dry time is definitely longer but I prefer a slower dry and I’ll explain why in the drying section of this article. BUT if your drying environment has uncontrollably high humidity and you want to dry your plants faster, you can hang individual branches and still wind up with a great end product.
I like to use regular, plastic clothes hangers to hang my plants from. What I do is chop the plants at the base, flip them upside down, and thread them through the clothes hangers so that they’re secure. Then I simply return them to the now empty grow tent and hang them from one of the bars at the top of the tent. Your grow tent is already set up with a carbon filter and exhaust fan so it’s an ideal spot to control the drying environment. If you opt to process your plant down to smaller branches, just make sure to leave yourself enough branch to drape over the hangers so that they don’t fall off while drying. I would also remove all of the largest fan leaves at this point but you can leave the smaller sugar leaves on.
Some people choose to do “wet trimming” at this stage but I would advise against trimming your buds while they’re wet. Wet trimming speeds up the drying process and makes for less trimming to do after the buds are dry but, in my opinion, and most growers’ opinions as well, it results in an inferior end product. Trichomes are easily broken while the plants are moist, and wet trimmed buds just never look as nice as dry trimmed buds. The faster drying time can be detrimental to terpene preservation and the efficient breakdown of chlorophyll as well. Plus, it’s VERY sticky and messy to handle wet plants.
Drying
Once your plants are cut down, processed, and hanging you will have to monitor your drying space to ensure that you stay within an acceptable range in regards to temperature and humidity. The ideal target is 60/60. That is 60 degrees fahrenheit and 60% humidity. Now, you won’t always be able to maintain perfection and you will still achieve great results as long as you stay close to that range. The only caveat being, don’t ever let humidity get higher than 60% in your drying space. Above 60% humidity and you will be heading into ideal conditions for mold to grow. But with temps ranging anywhere from 50-70 degrees you should be ok.
The amount of time it takes for your plants to dry will vary based on the conditions of your drying space, how dense your flowers are, how many leaves you left on the plants at harvest, and how well air is circulated in the space. Typically, I will let my whole plants hang for 14 days. If plants are broken down to individual branches then 10 days is usually the amount of time it will take. With that said, I’ve found that the slower you dry your plants, the better results you’ll have. When buds are drying, what is happening is that the moisture from the center of the flowers is slowly being drawn out to the outside of the bud. If you achieve the perfect range of 60/60 while drying, you are effectively curing the buds while they hang dry. A nice, slow dry will ensure that you preserve volatile terpenes which will give you a stronger smelling and tasting end product.
Place a small fan at the bottom of your tent to circulate air but avoid having fans blowing directly on your plants as this will cause them to dry too quickly.
Different conditions will result in varying dry times. If you’re experiencing temps in the 70 degree range, then I would expect whole plants to be dry after about 12 days. If you’re experiencing 55 degree temps, like in a basement during winter, then I would expect to add a few more days to the drying time. Also, lower humidity in the 40-50% range would definitely shave some days off of your drying time. What’s most important is that you don’t OVER dry your plants. Once you remove the buds from the branches, they will undergo further drying while curing in jars. If you happen to over dry your buds, that will effectively be the end of curing and you will end up with weed that smells like hay. The curing process requires moisture to break down chlorophyll and provide a proper environment for anaerobic bacteria to do their work, but more on that in the next section.
So how do you know when your buds are dry? Some people will suggest drying until branches snap but I would not rely solely on this test. If you maintain the coveted 60/60 range, it could actually be weeks past the optimal dry period before you see branches snap, at which point you’ve waited too long. What I suggest instead is drying until the outside of your buds feel a bit crispy and stop feeling squishy. At that point, I will see how easily buds separate from the branch they’re attached to. If they break off easily with little effort, then they’re probably ready. If you have to twist and pull to get them off the branch, then let them keep drying for another day until they come off easily.
If you do wind up jarring your buds a little prematurely you can always just take them out of the jars and leave them out for a little while to dry further. It’s better to under dry your buds than it is to over dry them. You can always dry them further but once they’re over dry, they’re pretty much ruined. You can still use them and will definitely have good effects from them, but the full experience of smell and taste will be drastically diminished.
Curing

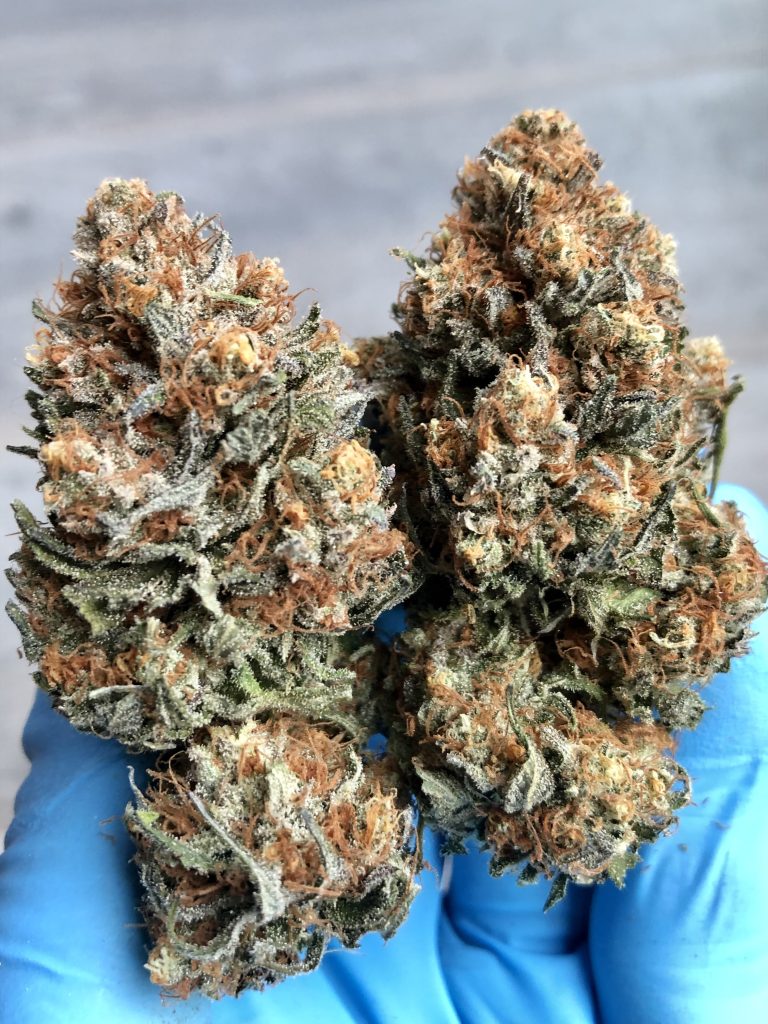
I won’t spend too much time talking about trimming since it’s really a matter of personal preference but I will suggest that when you are dry trimming your buds you should separate them into two piles. One pile for your primo “A” buds and another pile for your smaller “B” buds. You can smoke the small buds when you’re by yourself and then pull out the A buds when it’s time to show off. Or mix them all together. Your choice. The buds in the above picture are honestly not my best trimming work and nowadays I would take off more of the visible leaves but they really smoke just the same either way. Ok, on to curing!
Once your buds are trimmed to your liking, you’re gonna want to place them loosely into mason jars. You only want to fill up each jar about three quarters of the way so that you have room for the buds to breathe and so you can gently move them around. Once all of your weed is jarred place them in a cool, dark area. In a dresser or inside of a closed carboard box will suffice. Just don’t leave them in a hot place or in direct sunlight and they’ll be fine.
The next step in curing is making sure to burp your jars. What this means is opening the lids on each jar and allowing the moisture and gasses that build up inside to escape. For the first week of curing you should burp your jars at least once a day and make sure to move the buds around by gently rolling the jars until the buds move freely inside. If you notice that the buds are sticking together you should burp the jars for longer periods of time. Generally, for the first week of curing, you should leave the jars open for about 5-10 minutes depending on how moist they are to ensure full air exchange and allow humidity to escape.
Inspect your buds by smelling the open jars and handling a few of the buds inside. Pay attention to the smell of the buds. The smell of ammonia could be a sign that your buds were too wet going in and could indicate a mold/bacteria problem. This is very rare if you are careful and don’t neglect to burp and inspect your jars daily. Discard any jars that show any signs of mold growth as mold can make you very sick.
Pick up a bud and gently squeeze it between your fingers. At this stage they should feel a bit spongey and you want to see them begin to spring back to their original shape after squishing the test bud. If they bounce back a bit after squishing then you’re on the right track. If you press them between your fingers and they stay squished, kind of like playdoh, then they’re probably too moist and you should remove them from the jar and lay them out on some carboard to dry further. Leave them out for about an hour before placing them back in the jar.


During the second week of curing, you can usually move to opening the jars every other day and shouldn’t have to do much else besides popping them open for 30 seconds before closing. After a month of curing, it’s usually safe to burp the jars just once a week.
During the curing phase you are slowly working any remaining moisture present in the center of the buds outward. This is why dried buds will start to feel moist after being in the jars in the early weeks of curing. It’s basically a very slow drying process that enables beneficial, anaerobic bacteria to break down the chlorophyll in the buds which will result in a smooth smoking experience. This is why cannabis that is dried too fast, or not cured long enough, will feel harsh on your throat and lungs. After a week or two in your curing jars, you should notice that your cannabis feels smoother and less harsh when you smoke it as a result of the chlorophyll being broken down. After a month in jars, your buds should be nearly perfect.
HAPPY TOKING!!!
Now that you’ve made it to the end of the grow process you should be suitably addicted to growing and ready to tackle your next grow armed with the experience you’ve gained from your first attempts. If you have questions about any part of the process, or need any further clarification, please feel free to contact me and I’ll do my best to help you. Thank you so much for checking out this grow guide and please feel free to share with your friends and family! As a good friend of mine always says, “Peace and Pot”. See you soon, grow fam.
Click here Homegrow Long Island Blog for other installments of the Homegrow LI Grow Guide and to read about seeds and soil, containers and grow lights, equipment needed for your high-efficiency indoor cannabis growing set-up, as well as seed germination and seedling care.
And if you haven’t already, you are welcome to join Homegrow Long Island Grower’s Circle, our private online community of at-home cannabis cultivators growing and learning together.
If you have any questions about the information contained here, please feel free to leave a comment below for our community to learn from or contact us directly via email.
Use the buttons below to share this blog on social media with your friends and family.
Disclosure: Some of the links on this site are affiliate links, such as Amazon links. I may make a small commission from purchases made through some of those links, at no extra cost to you. I only link to products that I would personally use and that I believe are o