Watching your plants develop flowers is undoubtedly the most exciting phase of the cannabis growing cycle. You’ve put in all the work of germinating seeds, transplanting your plants, training them, and spending months watching them develop. The plants will be doing most of the heavy lifting from here on out but there are some key things to keep in mind and look out for while your buds swell and start glistening with trichomes.
Transplant Into Final Containers
Before initiating flowering, you will want to transplant your plants into their final 5 or 10 gallon containers. Just follow the same procedure we used when we transplanted from Solo cups to 2 gallon pots. Using bigger pots ensures that the plants will have plenty of soil to grow into and a large amount of available nutrients to draw from as producing flowers requires a lot of energy for cannabis plants.
You should add extra fertilizer to your soil when you mix it up just like we did in the previous transplant. If you want to keep it simple you can just add the same all-purpose organic fertilizer you used when transplanting to your 2 gallon containers but I would suggest adding a bit more of it for flowering. You can add up to two full cups of all-purpose fertilizers per 1.5 cubic foot bag of soil.
During flowering you can add up to two full cups of all-purpose fertilizers per 1.5 cubic foot bag of soil.
If you’d like to incorporate a more flowering-specific fertilizer regiment you can look for an organic all-purpose blend meant for flowering or you can build your own blend using single ingredient amendments. The flowering process uses more P (phosphorous) and K (potassium) than it does N (nitrogen) so tailoring your fertilizer regiment will make more efficient use of your inputs.
I’ve seen people have great results just using all-purpose fertilizer like Plant-Tone but if you’d like to experiment with creating your own fertilizer blends, I will be writing a blog entry detailing my own process in the near future and will link it here.
Initiating Flowering
To trigger your cannabis plants to begin flowering you will need to adjust the length of time your lights are on. Cannabis is a photoperiod plant (unless you’re growing autoflowers) which means that it responds to changes in the length of daylight it receives.
You will need to change your timers to 12/12 which means 12 hours on and 12 hours off. This will signal to the plants to begin flowering.
Generally, it’s a good idea to have the lights turn on during a time which you will be available to tend to your plants. I set my timers to turn the lights on at 12:00 noon and off at midnight but you can set yours to any time that’s convenient for your life and schedule as long as you stick to 12 hours on and 12 hours off. One thing to consider though is that it’s much easier to keep it dark inside your grow space at night. If you have your timers set to be off during daytime, you can potentially get light leaks inside your space which can disturb flowering plants.
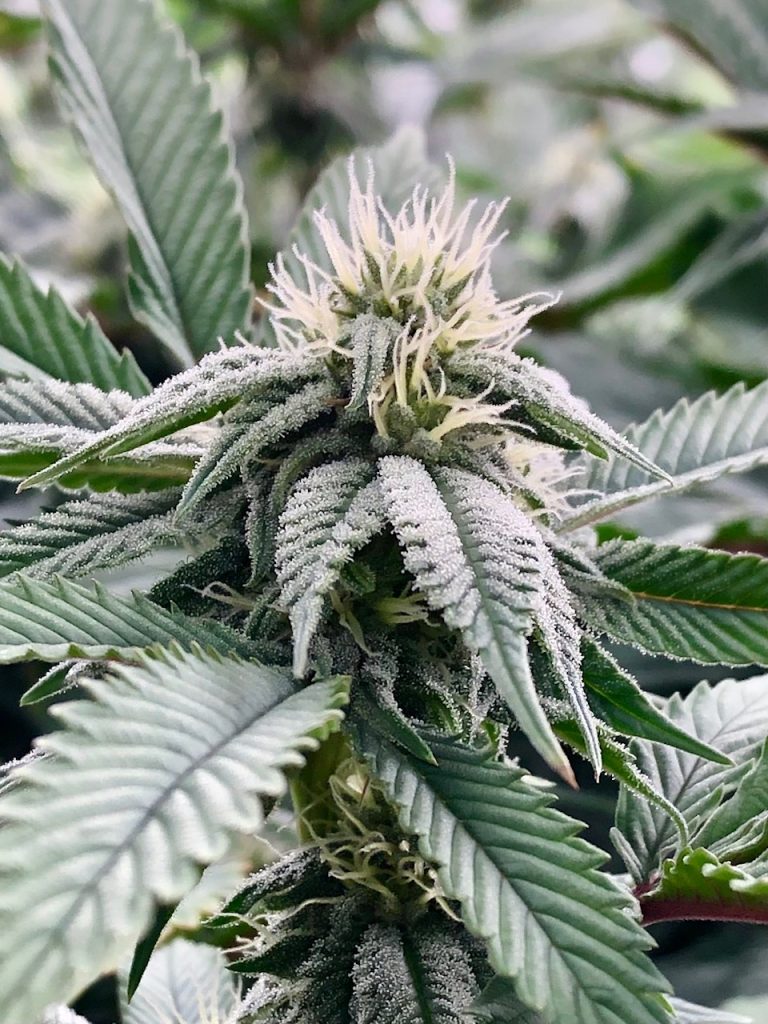
About a week after after you switch your timers to 12/12 you should start to see pistils emerging from the newly formed calyxes. Pistils are often referred to as “hairs” that emerge at the nodes of your plants and are part of the female plant’s reproductive system. If left to nature, these pistils would collect pollen from male plants and then recede back into the calyx to form seeds. But since we’re only growing female plants to avoid having seeded cannabis, these pistils will continue to emerge as new calyxes form and your buds grow larger.
Maintain Complete Darkness In Your Growing Space
It’s very important to not open your grow tent or otherwise disturb your plants while they are in the dark period during flowering. Opening your tent in the middle of the dark cycle can stress the plants and potentially cause genetic abnormalities and/or yield loss. Make sure that all of your vent ports and cable ports are cinched closed and that all of your zippers are closing properly to avoid any issues with light leaks.
While there is still much debate in the cannabis growing community over just how critical slight light leaks are, it’s usually a safe bet to just ensure that there is as little light in your space as possible during the dark period. For instance, some growers believe that a small light on a power strip inside your space won’t pose much of a threat to the dark period but I’d recommend putting some duct tape over them just in case. Better safe than sorry.
Some possible effects of light leaks include plants developing intersex qualities and self-pollinating. What this means is that stressed plants can develop small clusters of male stamen that contain pollen and in turn pollinate themselves. People often refer to these intersex parts as “nanners” as they resemble small bananas. If allowed to go undetected, these “nanners” can pollinate the plant they’re on, and even other plants in the room, and cause you to wind up with seeded bud. There are other stressors that can cause this trait as well but avoiding light leaks can reduce the risk of this happening.
Prepare For The Stretch Phase
When cannabis plants begin the flowering process they can stretch vertically towards the light about two to three times the height they are prior to switching your timers. They will continue this stretching for about two weeks. And since LED light has limited canopy penetration ability, you will want to try to keep your top growth limited to being 12 inches above your main canopy height.
In order to control the height of the stretch phase, you can implement some of the training techniques we went over in Part V of the Grow Guide. You can either tie plant wire around individual branches and pull them down using Low Stress Training or you can Supercrop any branches that get too tall. I would advise using caution with Supercropping as excessive use of this technique can cause plants stress. You want to try and limit stress during all phases of the flowering cycle.
After about 10 days you can back off of trying to control the stretch phase as long as you have enough head room to allow the plants to grow vertically. You just want to avoid having a situation where your plants grow too tall and start getting burned by your lights.
Top Dressing During Flowering
I like to give my flowering plants a nutrient boost at certain points during flowering. For a typical 8-9 week flowering strain I will top dress my plants at the beginning of Week 2 and Week 5. Since organic fertilizer takes time to break down before it’s available to plants, any fertilizer you add to the soil will be able to be used by the plants a couple of weeks after application. For this reason, you need to try to avoid nutrient deficiencies rather than react to them. Organic gardening is a game of prediction in this regard.
My typical top dress regiment in Week 2 and Week 5 consists of two tablespoons of kelp meal, two tablespoons of neem meal, two tablespoons of fish bone meal, and 1 cup of earthworm castings per plant. Spread the fertilizer across the top of your soil while keeping it away from the stalk of the plant. Then just water as usual. Every time you water after that, the plant will get nutrition from the fertilizer on top of the soil.
If you’re growing a plant with a 10 week or more flowering time I would top dress once more in Week 7 to make sure the plants have enough food to finish strong.
Maintain Cleanliness In The Grow Space and Be Patient
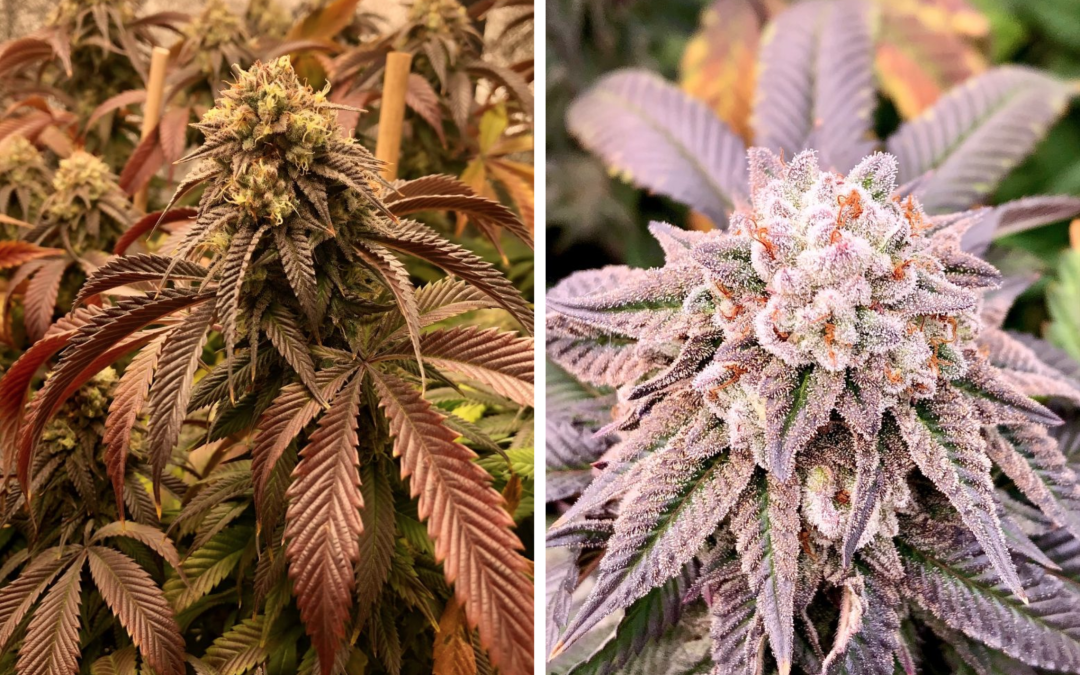
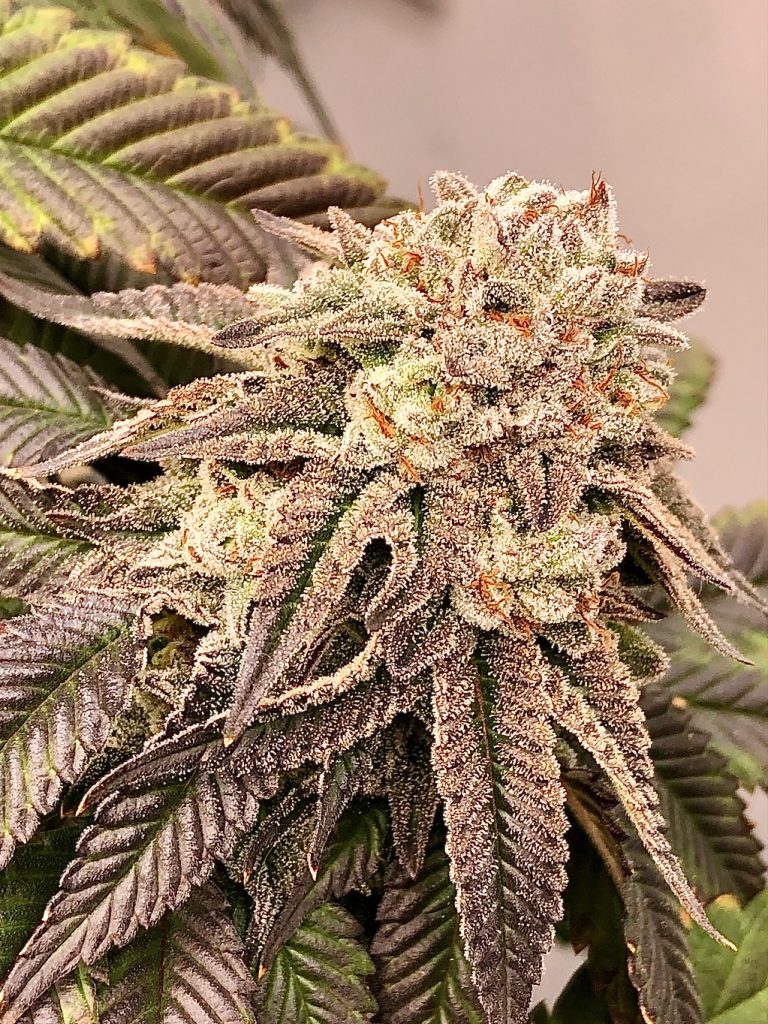
As you get deeper into the flowering phase, your plants will begin to deplete nutrients stored in the leaves and the leaves will undergo color changes. We usually expect to see this color change, or senescence, begin in Week 6 or 7. Depending on what strains you are growing, the leaves may turn shades of purple, red, or yellow. If you notice yellowing before then, it may be a sign of nutrient deficiency rather than normal senescence and you may want to consider adding a top dress of fertilizer.
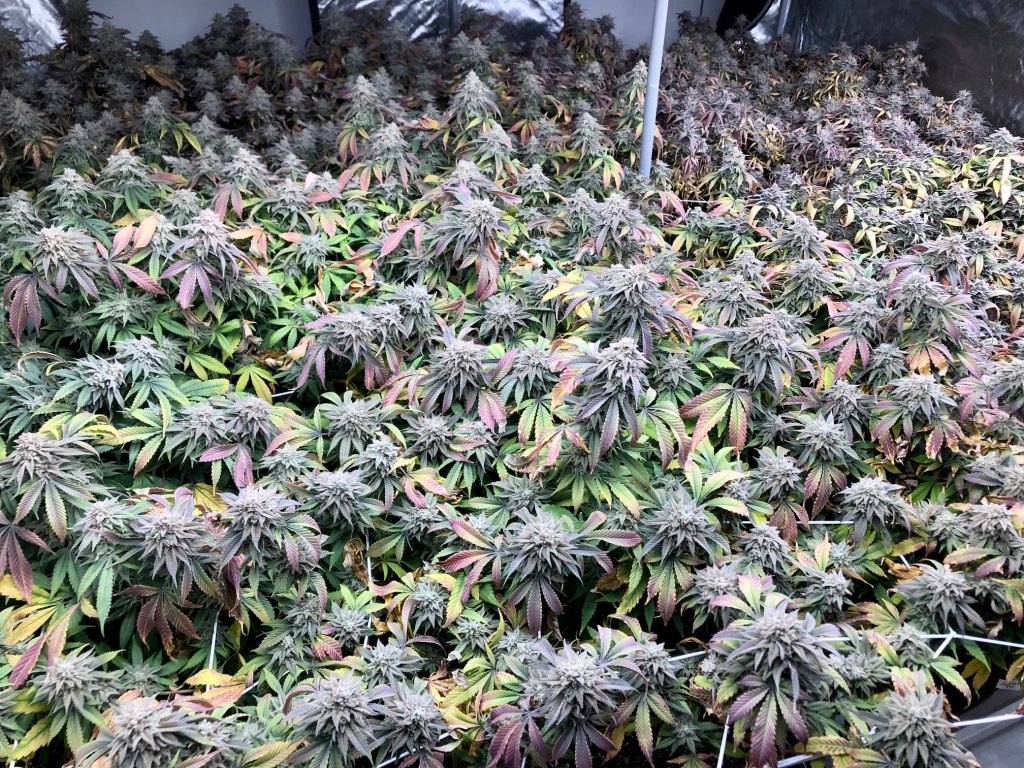
Leaves in senescence will begin to drop from the plant as they are used up. Make sure to pick up any dead leaves in your grow space as decaying organic matter is an invitation to pests and mold. You can also gently tug on any yellowed leaves that are still attached to your plants to remove them but you should only remove leaves that come off easily. If you need to exert force to remove leaves, then just leave them until they’re ready to come off.
Most important of all is to have fun and enjoy the process. As long as you provide your plants with a suitable environment and water/feed properly, you will wind up with flowers that you are proud of. Nothing beats using cannabis that you nurtured from seed to flower and the peace that you’ll experience while in your garden is unmatched by many things in life.
In Part VII, the final chapter of our grow guide, we will go over how to know when your cannabis plants are ready to harvest. We will also go over how to properly dry and cure your harvested flowers. Knowing when to harvest your plants is crucial and requires a lot of patience on behalf of the grower but we’ll help you get a good understanding of what ripe cannabis flowers look like. When you’re ready, we’ll see you in Part VII.
Click here Homegrow Long Island Blog for other installments of the Homegrow LI Grow Guide and to read about seeds and soil, containers and grow lights, equipment needed for your high-efficiency indoor cannabis growing set-up, as well as seed germination and seedling care.
And if you haven’t already, you are welcome to join Homegrow Long Island Grower’s Circle, our private online community of at-home cannabis cultivators growing and learning together.
If you have any questions about the information contained here, please feel free to leave a comment below for our community to learn from or contact us directly via email.
Use the buttons below to share this blog on social media with your friends and family.
Disclosure: Some of the links on this site are affiliate links, such as Amazon links. I may make a small commission from purchases made through some of those links, at no extra cost to you. I only link to products that I would personally use and that I believe are of the highest quality. Any purchases made through affiliate links enable me to continue creating content for this website and are greatly appreciated!