For the uninitiated grower, starting seeds can be a little intimidating. By the time you’ve gotten your seeds you’ve probably spent hours researching strains, getting your orders ready, and anxiously awaiting their arrival. Good cannabis seeds are expensive and nobody wants to risk messing anything up. Even after growing hundreds of plants I still get a little anxious from time to time about starting new seeds.
With that said, starting seeds is a pretty simple procedure and most people will have close to 100% success as long as a few simple rules are followed:
- Maintain temperature of 70-80°F
- Maintain humidity of 70-90%
- Keep your growing medium moist but never wet
- Minimize time spent handling seeds
- Supply young seedlings with low levels of light as soon as they emerge from the soil
Seeds require moisture, warmth, and darkness to initiate germination. Once they are exposed to moisture, the shell of the seed will usually crack open within 24-72 hours and a taproot will emerge. This taproot is what anchors the seedling to your growing medium and a network of lateral roots will branch off of the taproot to mine your medium for nutrition.
Choosing A Germination Method
Most growers choose from one of three ways to initiate germination:
- Pre-soaking in distilled water until the taproots emerge
- The paper towel method
- Planting the seeds directly in soil
Pre-soaking the seeds and waiting for the tap root to emerge works well but can offer a point of failure for growers. The newly emerged roots are fragile and you risk damaging them when moving the seeds from the water and into your soil. For this reason, I would advise against soaking the seeds and waiting for the roots to emerge. I do advise giving them a shortened period of soaking before planting them into your soil but I’ll get back to that in a minute.
The paper towel method is a pretty popular choice for many growers, and I have used it with success myself, but it is not my technique of choice. This method entails moistening a paper towel (moist not wet), folding it in half, laying your seeds in the fold, and putting the paper towel in a bag in a dark place to begin germination. It works fine usually, and you get to see the taproots emerge, but again, you risk damaging the fragile roots when you pick the seeds up off of the paper towel to move them into your soil. The roots sometimes even work their way into the paper towel and can become stuck, forcing you to rip the roots free. It’s fun if you feel like doing a little grade school science class project, and it definitely works, but I prefer to live by the mantra of “simple is best”.
Planting seeds directly in soil is the simplest technique and, in my experience, works every bit as good as the previously mentioned techniques while also reducing handling time of the seeds and potential damage to the emerging taproots. I do pre-soak my seeds in a shot glass filled with distilled water for about 12-24 hours to initiate germination before placing them in my soil, but I feel that this step may not be completely necessary. I don’t think it can hurt anything since I try to plant my seeds before the shells crack, and I do feel that it may jumpstart the germination process, but feel free to experiment with your own approach or try multiple techniques to see what you prefer.
Preparing Soil And Sowing Your Seeds
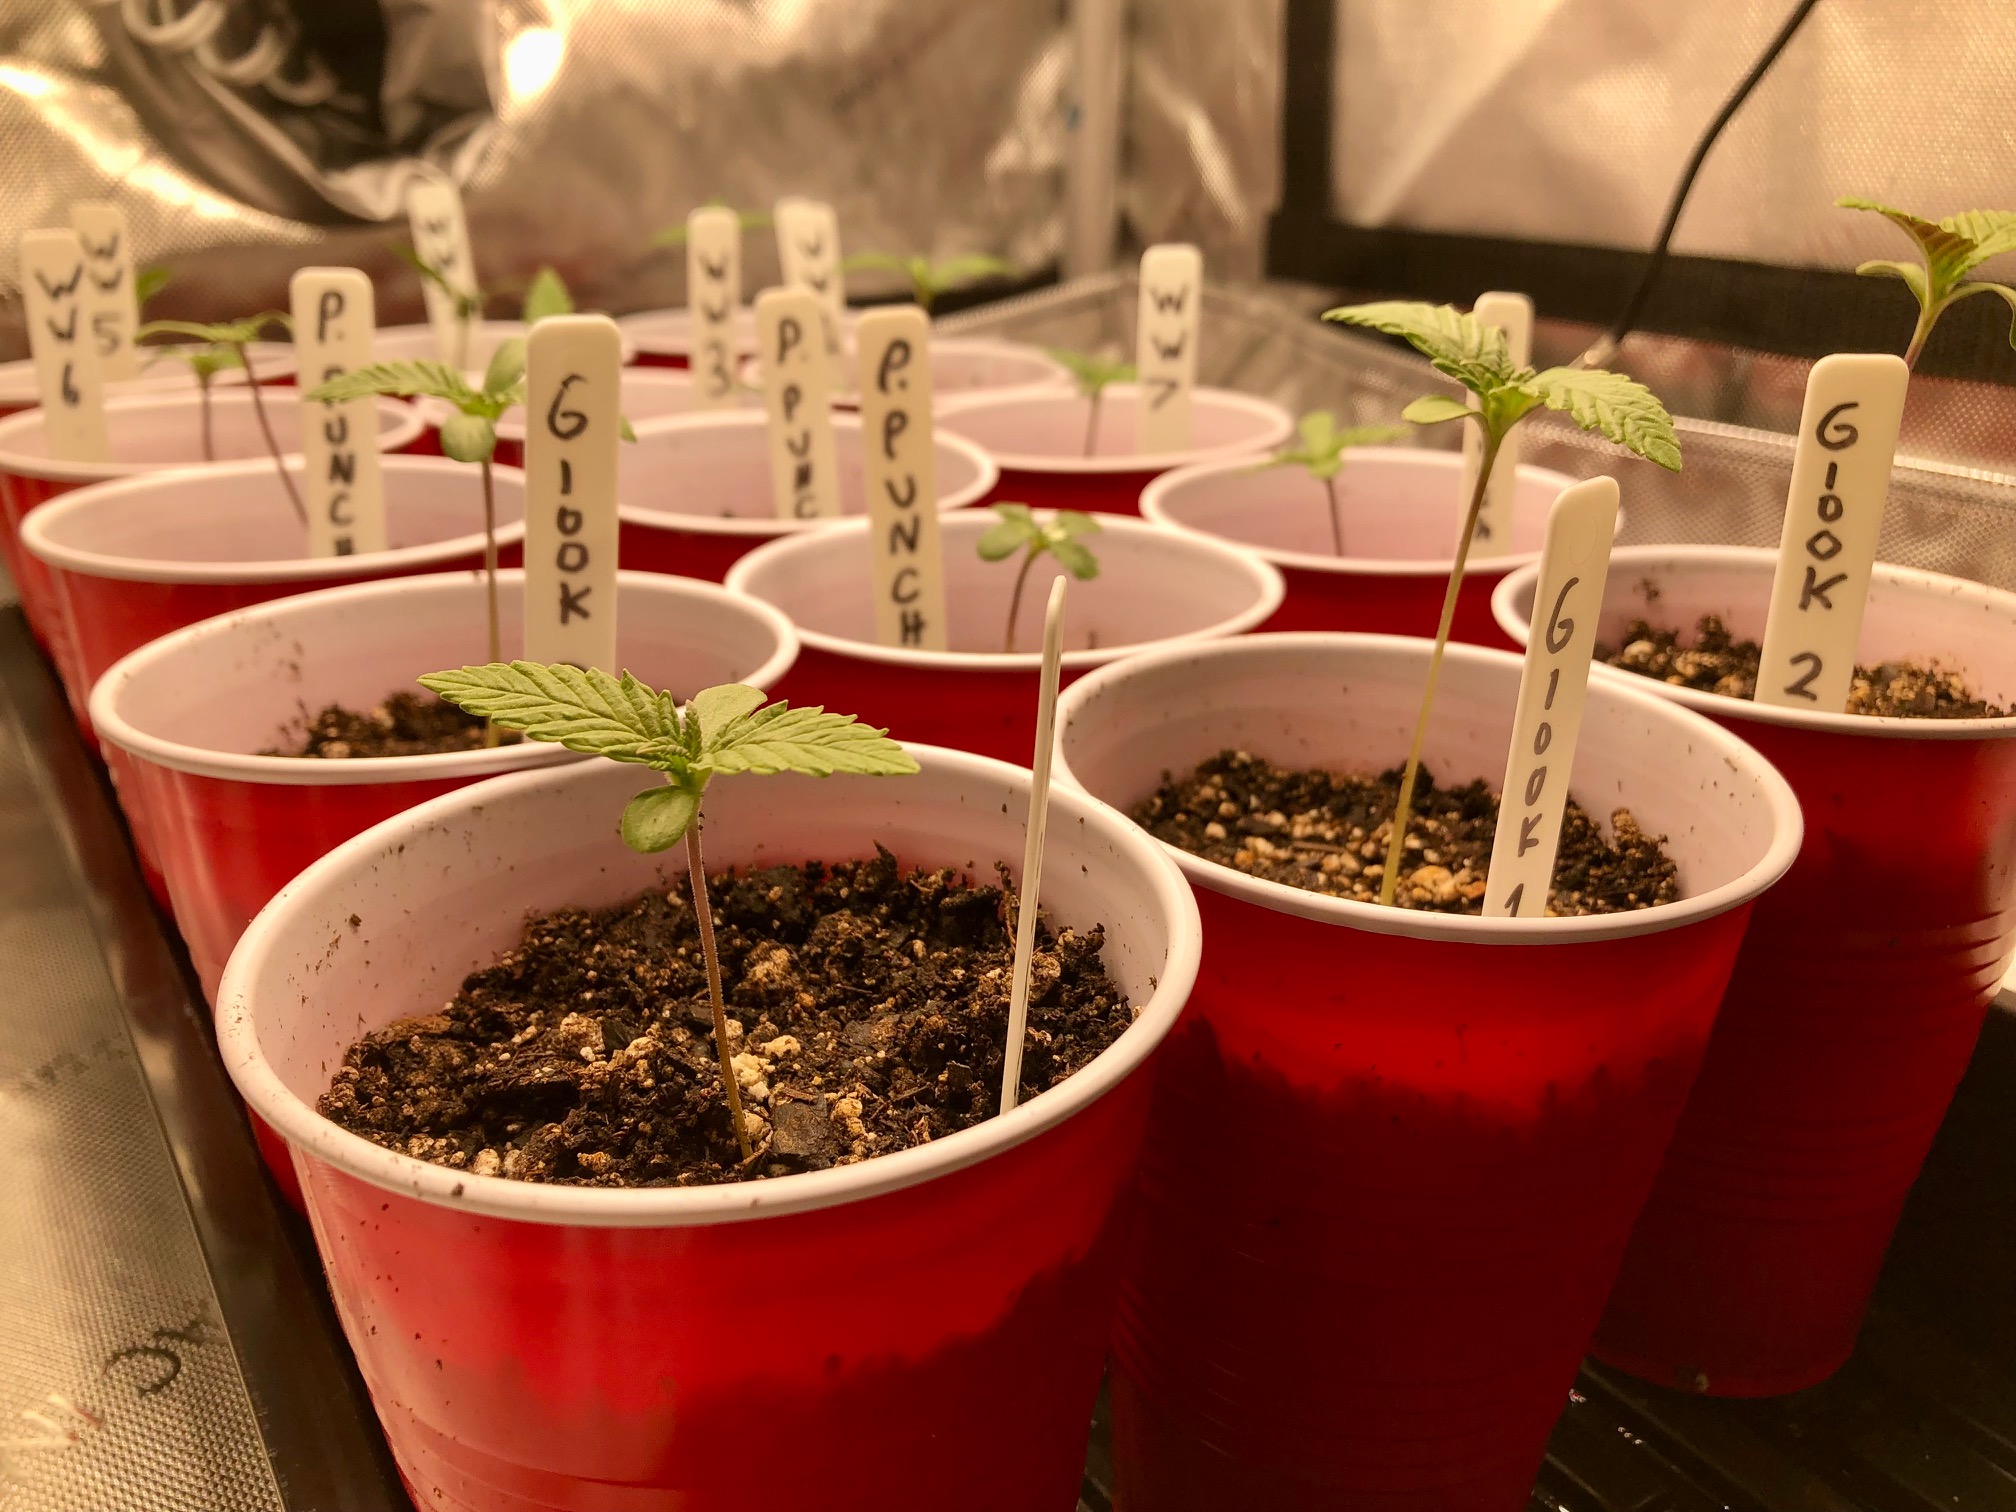
Regardless of which germination technique your choose, you will ultimately plant your seeds in soil. I recommend using Solo cups with drainage holes drilled in the bottom to allow proper drainage. First, prepare your soil to be used in the cups by pre-wetting it with enough water so that it holds its shape when you clump it together but easily breaks apart with your fingers. Again, you want the soil to be moist but not wet. Fill the cups a little over three quarters of the way up with your pre-moistened soil and lightly tamp the soil down a bit. You don’t want to pack the soil tight. Then use a pencil or a chopstick to make a hole in the center of the soil a quarter inch deep. You don’t want to go too deep with cannabis seeds but you do want them deep enough to block light.
Finally, drop one seed in each hole and cover the hole loosely with soil. Don’t pack it down! You want the seed to be covered and you want it to be easy for the seedling to push its way out of the soil. Then mist the top of the soil with a spray bottle to water it in. You don’t need to add a lot of water at this early stage. Too wet of an environment can cause your seeds to rot so be conservative with water here. If you use one of the techniques in which you’ll be handling seeds with emerged taproots, be careful to not break the root and do your best to plant the seeds with the root facing down.
Seedling Stage
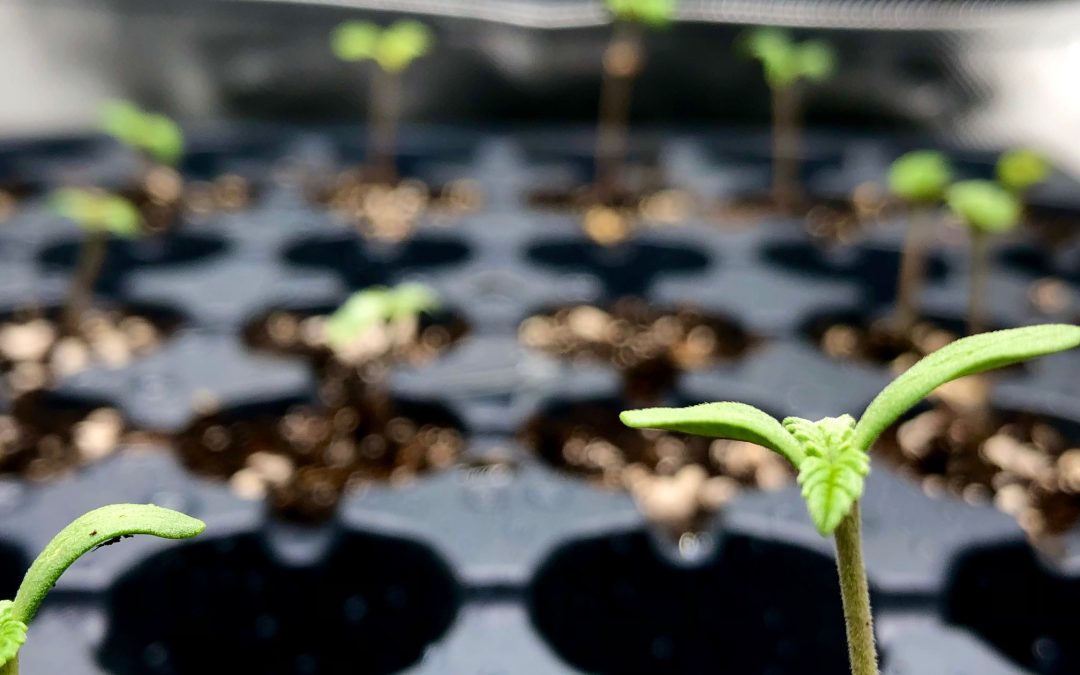
After planting your seeds you should see sprouts emerge from the soil about 2-5 days later. Some strains can take up to two weeks to emerge but generally I’d expect to have any viable plants emerging from the soil no later than a week after planting. I usually give up on seeds that haven’t come up after a week.
When your seedlings first appear, they will have two small leaves called cotyledons. They’re also sometimes referred to as “seed leaves” as they are part of the seed embryo and will power the formation of roots and your first sets of true leaves. Once your seedlings appear above soil you will want to make sure they have sufficient light to begin photosynthesis. You don’t need a lot of light for seedlings but you want to make sure they’re given enough to avoid stretching. If your seedlings get very leggy and tall, it’s usually a sign that you need either more light or to move your light closer to the plants. I use a 100 watt LED grow light dialed down to 20% and keep it 12 inches above my plants to start. I will usually dial the light up every few days as the plants develop more leaves and are able to take in more light.
Your first set of true leaves will have the classic cannabis serrated leaf shape but will only have one blade. The next set of leaves after that will have three blades and then subsequent leaves will have five blades. The number of blades per leaf is strain specific but generally you will wind up with between five and eleven blades on each leaf.
Watering Seedlings
The biggest mistake that most new growers make is overwatering. Cannabis likes a good dry down period between waterings so that the roots can take in enough oxygen. Giving too much water can drown the roots and will usually manifest in leaves drooping and curling down under themselves. The only solution to overwatering is to let the soil medium dry completely before giving water again.
The best way to gauge when it’s time to water is by picking up your containers and getting a feel for the weight of the soil when it’s fully watered. Once you notice that the container feels very light and the top of the soil looks dry, you can then water with confidence. You don’t want to let the plants get so dry that they start to wilt but it’s not the end of the world if they start to droop a little. They usually bounce back very quickly from underwatering. Give enough water so that a little bit comes out of the bottom drainage holes and then back off.
Nutrients For Seedlings
Using the organic approach, you usually don’t need to provide any additional nutrients to your seedlings while they are in their Solo cup containers. If you’re using Fox Farms Ocean Forest soil or something comparable, it generally has enough nutrition in it to get your plants to the point where they need to be transplanted into bigger containers. Cannabis grows fairly quickly and they’ll usually outgrow Solo cups in 10-14 days at which point you’ll need to transplant them to bigger pots.
When you transplant the seedlings into their next pots, you will provide the nutrition they will need for the next phase of their lives with dry amendments added directly to the new soil. The organic approach is pretty straightforward and simple and relieves you of having to measure out liquid plant food from bottles. You’ll mostly just need to make sure you keep your plants properly watered and provided with enough light for healthy growth.
In Part IV of the Homegrow LI Grow Guide we will go over the process of transplanting and the vegetative cycle of cannabis plants.
Click here Homegrow Long Island Blog for other installments of the Homegrow LI Grow Guide and to read about seeds and soil, containers and grow lights, and other equipment needed for your high-efficiency indoor cannabis growing set-up.
And if you haven’t already, you are welcome to join Homegrow Long Island Grower’s Circle, our private online community of at-home cannabis cultivators growing and learning together.
If you have any questions about the information contained here, please feel free to leave a comment below for our community to learn from or contact us directly via email.
Use the buttons below to share this blog on social media with your friends and family.
Disclosure: Some of the links on this site are affiliate links, such as Amazon links. I may make a small commission from purchases made through some of those links, at no extra cost to you. I only link to products that I would personally use and that I believe are of the highest quality. Any purchases made through affiliate links enable me to continue creating content for this website and are greatly appreciated!