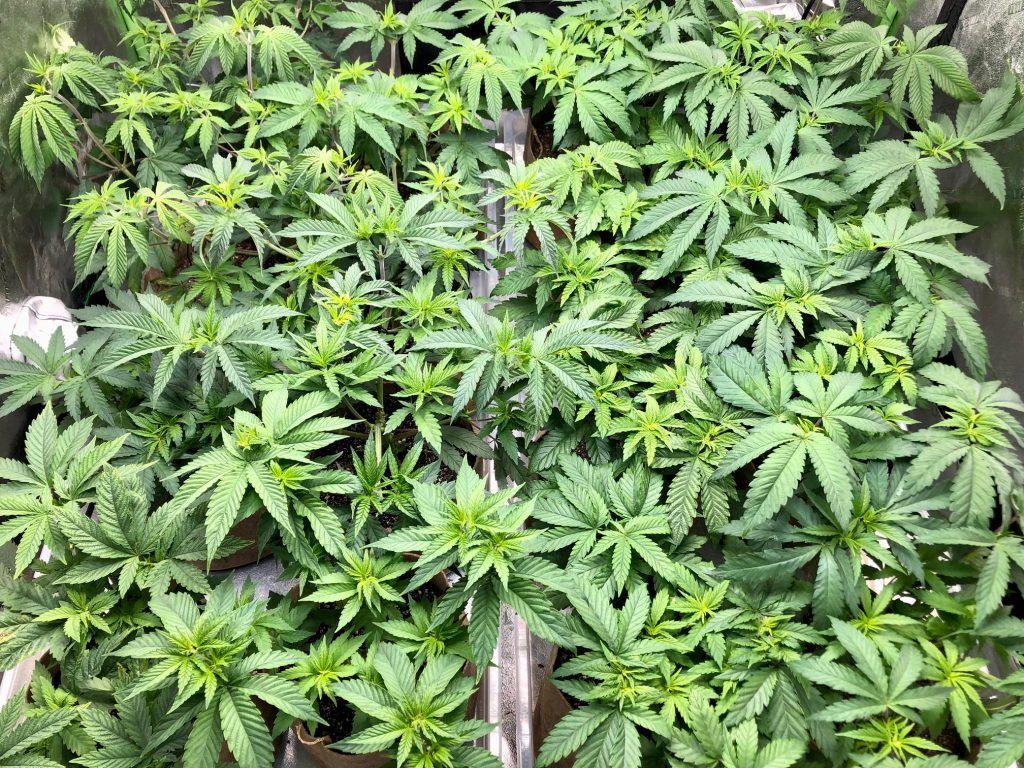
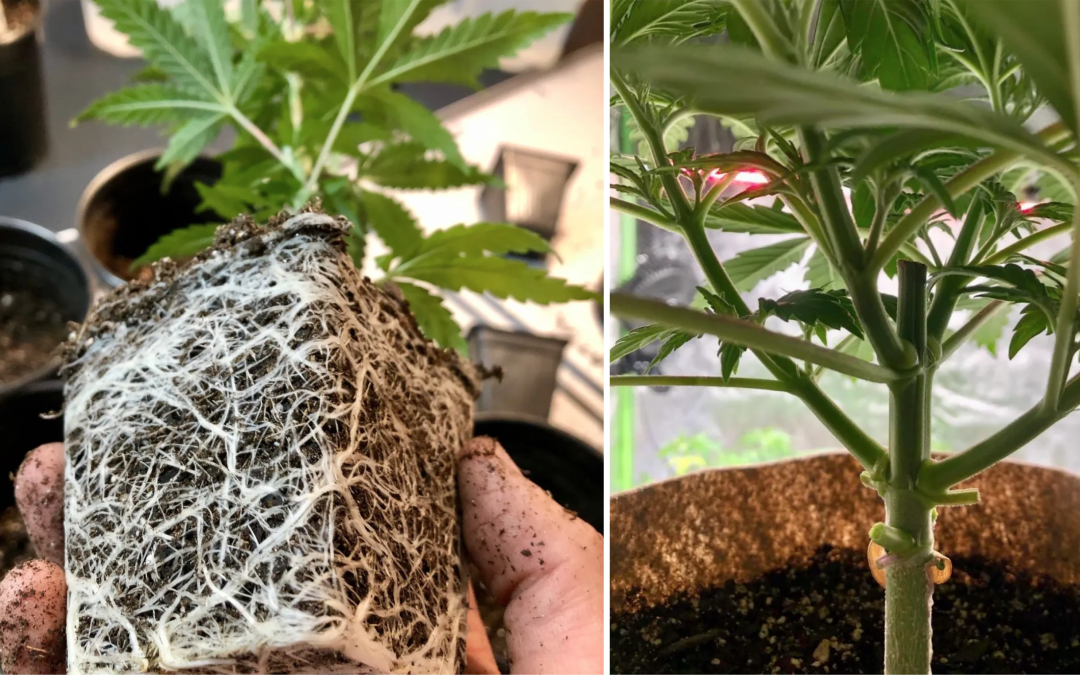
Transplanting your seedlings from Solo cups, or small 4-inch nursery containers, into bigger pots should generally be done once the leaves have reached the edges of the container and the plants start needing watering every day or two. You also may observe that roots start poking out of the drainage holes. Once the roots have sufficiently filled the soil, you’ll notice your medium becoming dry and light more quickly between waterings. This is a sign that your plants want more space. If you wait too long, your plants can become rootbound and growth could be slowed down. A rootbound plant will have roots circling around the container which can lead to deficiency symptoms, drooping, and a slightly more involved transplanting process, although it’s not really a big deal as long as you catch it early enough.
Preparing Soil and Pots For Transplanting
I recommend transplanting from Solo cups into 2 gallon fabric pots. This size pot will provide sufficient space, nutrition, and vegetative growth time to get you to the final transplant into 10 gallon pots before initiating the flowering cycle. Prepare your soil by pouring a fresh bag of potting mix into a big container (I use 27 gallon HDX totes from Home Depot). Add one cup of all-purpose organic fertilizer like Coast of Maine Stonington Blend or Espoma Plant-Tone per 1.5 cubic foot bag of soil and mix it thoroughly into the soil. Really get in there and stir it up. I mean like elbows deep, pulling the soil up from the very bottom and getting that fertilizer spread out evenly.
Most decent soils like Fox Farms Ocean Forest, Happy Frog, or Mother Earth Groundswell will have enough nutrition in them to get your newly transplanted seedlings to the final transplant before flowering. But I like to add a little insurance by incorporating the organic fertilizer since some strains may be hungrier than others.
Once your soil is thoroughly mixed, add about a gallon of water to the soil and mix it up again. Your goal is to get the soil moistened to the point that it will clump together in your hands but break apart easily. Then fill your 2 gallon pots about halfway with soil and get ready to take your plants out of their Solo cups.


Remove Seedlings From Solo Cups and Plant In New Containers
Make sure to water your plants 1-2 days before transplanting to ensure that the soil is moist enough to hold together when you remove them from the cups. This isn’t critical, and I’ve transplanted dry plants before, but it seems to be a little easier on the plants. Once you’re ready to go, gently squeeze the sides of the cup and push up on the bottom to separate the soil from the container. Then place your hand over the top of the cup, with the stem of the plant between two of your fingers, and flip it upside down to slide the entire root ball out of the cup.
Take your plant and place it into your new container while making sure that the top of the root ball is about an inch lower than the rim of your new pot. Adjust the soil in the pot if you need to raise or lower your plant to achieve that height. This inch of space is to allow you room to water and/or add more fertilizer if necessary without having spillage.
Once you’re happy with the placement of your plant, go ahead and fill in around the root ball with your soil mixture. Once the pot is filled and your root ball is buried, you can tamp down lightly on the soil to compact it a TINY bit, but make sure not to pack it tightly. You want the soil to be up against the root ball but not so tight that the roots have difficulty getting through the soil.
After your plants are all transplanted, water them in by giving a light watering of about two cups of water. Your soil should already have a decent amount of moisture from the mixing stage but you should always water your plants after transplanting to settle the plants into their new homes. After watering, pick your pots up and gauge the weight of the plants so you have an idea of what a fully watered pot feels like. You’ll want to wait until your plants feel light before watering again. At this initial stage, you shouldn’t have to water these new transplants for at least a week. The roots will work their way through the new soil seeking out water and you want to be careful to not overwater your pots. As time goes on, intervals between watering sessions will shorten and you will have to water the plants more often as the containers becomes filled with roots.
Vegetative Phase
The next stage after the seedling phase is the vegetative phase. This is the time when your plants will really start branching out, making lots of leaves and gaining height rapidly. If you’re growing in a tent, you will need to manage this growth in order to ensure a good yield of high quality buds. The next article of our grow guide will be all about various training methods to shape and control your plants, but for now, let’s just do a rundown of a few things to keep in mind during the vegetative phase.

Proper Environment For the Vegetative Phase
- Maintain temperature of 70-85 degrees Fahrenheit
- Humidity between 40-70%
- Lighting period 18 hours on, 6 hours off
- LED grow lights should be about 18-24″ above plant canopy (depending on light type and wattage)
You have a fair amount of leeway with temperatures and humidity here. Nighttime temps during lights out can even go into the 60’s with little to no issues so keep in mind that there is a wide range that these plants can handle. You don’t want your temperature to go into the 50’s as that will stunt growth and you don’t want your humidity to go below 40% as this level of dryness can cause your plants to close their stomata (pores on leaves) which can lead to poor CO₂ uptake and pH issues in the soil.
Monitor your temperature and humidity and adjust your exhaust fan settings as needed to dial in a comfortable environment for your plants. If you choose to use the AC Infinity in-line fan as your exhaust fan, do yourself a favor and make sure you get “Controller 67” with it. You can dial in temperature and humidity triggers that will ramp up the fan speed as the threshold you set is reached. It’s REALLY convenient and has freed up my brain to deal with other things besides constantly monitoring my tent.
Proper Watering
With the organic growing method, you’ll have to keep a few things in mind with watering. The extra organic material in the soil from dry amendments causes the medium to retain extra moisture. And since cannabis roots love oxygen, you’ll want to make sure that you allow your soil plenty of time to properly dry out before watering again. If you water too heavily, too often, you will drown your roots which will cause symptoms such as leaf drooping, yellowing, and general lack of growth vigor.
Every grower will experience symptoms of overwatering. It just happens. You’ll worry that your plants are gonna dry out and you’ll jump the gun on watering only to find your precious plants drooping and looking sad afterward. If this happens, don’t panic. All they need is time to dry out and recover and they’ll be back to looking healthy again in a couple of days. And whatever you do, don’t listen to your friends who tell you to “flush” your plants every time you run into an issue. The practice of flushing entails pouring copious amounts of water through your soil in an effort to wash out excess nutrient salt buildup. There is a time and place for that practice but it’s generally unnecessary in organic cultivation and will only further devastate an overwatered plant.
It’s better to wait until the plants are completely dry and the pots feel light as a feather before watering. I even wait until bottom leaves start to show early signs of droop before watering, if I’m not sure it’s time to water yet.
Overwatering is way more detrimental than underwatering. Underwatered plants will recover within an hour of getting watered. I’ve even seen plants that I’ve written off for dead spring back to life in a matter of hours after watering.
You’ll also want to avoid runoff as much as possible when growing organically. Runoff is the extra water that comes out of the bottom of the pot when watering. Non-organic methods of growing, like using synthetic nutrients in coco coir, rely on extra runoff to remove excess salt buildup in the growing medium. But with organic soil, excess runoff will only result in precious nutrients being washed out of your soil. So do your best to ensure that your soil is thoroughly moistened while avoiding excessive runoff during watering.
To review and break it down simply:
- Avoid overwatering. Only water when soil is dry and light
- Do not “flush” overwatered plants
- Avoid excessive runoff when watering
- Never panic
Vegetative Phase Length
Generally speaking, you can leave your plants in the vegetative period for as long as you wish. You can veg for as short as three weeks from germination or you can veg for six months if you have the inclination and space to do so. A long vegetation period would require lots of training of the plants but could potentially deliver a high yield using fewer plants. A shorter vegetation period would result in smaller plants with less yield but you could possibly make up for the yield loss by simply growing more plants in your space. The number of plants you grow can either be a personal preference or a criteria you choose to stay within based on state laws.
I usually veg my plants for about two months and implement a number of training techniques to keep them short enough to maintain a healthy distance from my lights but tall enough to max out the yield potential of my space.
For first-time growers, I would recommend vegging your plants for two weeks after transplanting into your 2 gallon pots, then transplanting into 10 gallon pots. After transplanting into 10 gallon pots, I would recommend two more weeks of vegetative growth before flipping to 12/12 lighting to initiate flowering.
This will give you decent sized yields and some experience under your belt without having to worry too much about training. I usually recommend that new growers get at least one successful grow in before trying to increase yields via training. Experience is a true confidence builder.
But if you’re the type of person who just wants to go the distance on the first grow, please feel free to try your hand at training! In Part V of the Homegrow LI Grow Guide we will go over various plant training techniques, ranging from easy to more advanced, and at which growth stages to implement these practices. If you don’t want to worry about training plants on your first grow, please skip ahead to Part VI of the Grow Guide where we will go over initiating flowering and care for flowering cannabis plants.
Click here Homegrow Long Island Blog for other installments of the Homegrow LI Grow Guide and to read about seeds and soil, containers and grow lights, equipment needed for your high-efficiency indoor cannabis growing set-up, as well as seed germination and seedling care.
And if you haven’t already, you are welcome to join Homegrow Long Island Grower’s Circle, our private online community of at-home cannabis cultivators growing and learning together.

If you have any questions about the information contained here, please feel free to leave a comment below for our community to learn from or contact us directly via email.
Use the buttons below to share this blog on social media with your friends and family.
Disclosure: Some of the links on this site are affiliate links, such as Amazon links. I may make a small commission from purchases made through some of those links, at no extra cost to you. I only link to products that I would personally use and that I believe are of the highest quality. Any purchases made through affiliate links enable me to continue creating content for this website and are greatly appreciated!


